Have you ever found yourself watching the progress bar like a hawk while your video file uploads … wishing that you had maybe recorded a shorter video or had a faster wi-fi connection? Wouldn’t it be simpler if one needn’t spend time uploading videos taken from their Webcam before placing them on the web?
At AudioAcrobat, we’re always looking for ways to make the process of recording, broadcasting and distributing audio and video on the web simpler than ever, and our Video Web Recorder does just that!
Not only does AudioAcrobat’s Video Web Recorder allow you to skip the upload process and record directly from your webcam to your AudioAcrobat account, it allows for prompt online hosting with access to HTML Player Code for publishing to websites and HTML Newsletters as well as direct links (download/streaming only) for email and social networking sites.
In short, you are now able to go from the cutting room floor to global presentation in just a couple of clicks.
Quick Steps:
1. Login to your AudioAcrobat account
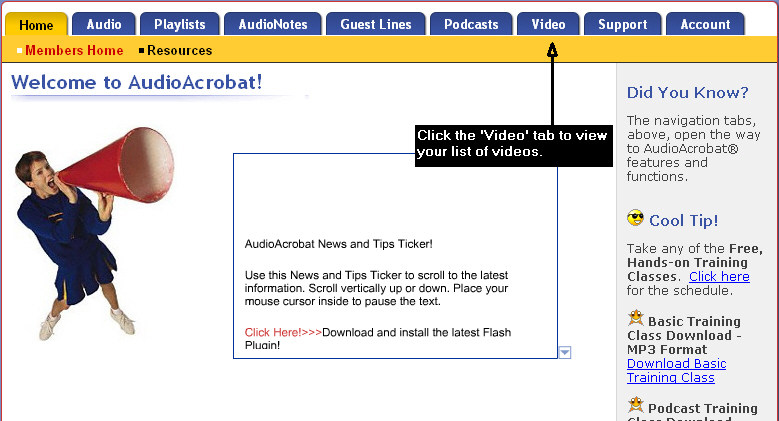
2. Click the blue “Video” tab
3. Click “Create New Video”
4. Click “Video Web Recorder”
Expanded Steps:
Login to your AudioAcrobat account
Click “Create New Video”

If this is your first time using AudioAcrobat’s Video Web Recorder or if you haven’t already chosen to save your Adobe Flash Player privacy settings, you will see something that looks very similar to this box:

Click “Allow” and you will then see the “Begin” button.
We will also show you how to save your preference for this selection, which will prevent this step from entering the process during future recordings.
Click “Begin” to move to the next step and begin recording.
![]()
At this time you should see the live video feed from your webcam displaying in the center of your page.
If you do not, simply click the “Configure Camera” button to the left.  You will then be able to select the correct device from the drop-down that will appear in the pop-up window as seen below:

Hint: When the correct device is selected, you’ll see the live video feed appear on-screen.
If you want to save your privacy setting preferences (“Allow“), you can do so by placing a check in the “Remember” box and saving your settings by clicking “Close“.
Now that the settings are saved and you can see the live feed from your webcam, you can press the “Record” button at any time to begin recording.
![]()
Note: You have up to (1) hour to make your recording, and there is no limit to the amount of recordings you can create/store in your account.
Want to review your work before you save? Click the “Play” button for real-time review.
![]()
Before you save, you have the option to enter a title and description for your recording.
If you don’t wish to enter any information at this time, not to worry — it can be added/modified later from within your account by clicking the “Video” tab to view your list of videos, clicking the title of your video (“Saved Video Recording” if no title was previously specified) and choosing “Edit Description“.
If you’re ready to save and encode/optimize for streaming on the web, simply press the “Save” button at the bottom of the page or click “Cancel” to leave the recording session.
Pretty easy, huh? What’s that … you still don’t believe us? Give it a try yourself by signing up for a 30 day Free Trial. Already have an account? Login here.
Coming up next … Recording Audio using the Audio Web Recorder!


