Last week we pulled the trigger and began the exodus from WordPress.com to our self-hosted WordPress installation here on the AudioAcrobat.com domain. While overall it went pretty smoothly, there were several unforeseen hurdles along the way.
What we hope to accomplish in today’s post is providing you with the information which helped us overcome these hurdles and allowed us to make the transition in a timely manner … without losing any data, followers or web traffic / SEO.
Where to begin? Oh yes…
Planning
Planning the migration from WordPress.com to a self-hosted WordPress(.org) installation will require a bit of planning. Ideally, you would want to choose the day of the week in which your traffic is lowest to schedule the majority of heavy lifting. Check your WordPress / Jetpack stats here if you’re unsure of which day(s) are lighter for your visitor flow.
Hosting
In order to move your WordPress.com blog to a self-hosted installation, you will need to have the new WordPress installation hosted somewhere on the web. In most cases, a shared or dedicated server hosted with a WordPress-recommended hosting service will be the ideal situation, as it will prevent you from purchasing, setting up and maintaining a server in your closet / office.
Export
Exporting your data from WordPress.com is a pretty straight-forward task and is probably the shortest part of the entire process. Here’s a helpful guide to knocking this step out of the park.
Import
This is where things got hairy during our migration. The difficulty that we initially ran into was that our export file (eXtended RSS aka WXR) was 9.7 MB in size, and the max allowed filesize upload with our HostGator account was 2 MB.
After a decent amount of Googling, we discovered a very helpful tool that made this part of the process much more simple. It is called WordPress WXR Splitter and yes, it is for Mac. PC users click here for a different, PC-based program which does the same thing.
After splitting our 9.7 MB eXtended RSS / WXR file into 10 smaller files between 1-1.8 MB, we were finally ready to begin the import process.
Oh, you may need to install the official WordPress Importer plugin as well. Ours was already there because HostGator’s “Quick Install” is pretty awesome and included it from the get-go.
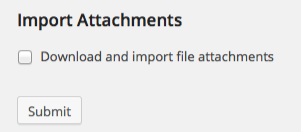
 So yeah… we imported the 10 smaller, split-up versions of the eXtended RSS / WXR file using the WordPress Importer plugin, but made sure to leave the “Download and import file attachments” box un-checked(!), as a number of others on the web had some serious timeout and missing media issues. This also helped us breeze through this part of the process by not forcing the plugin to do all of the attachment / media importing, just focusing on importing the posts / pages / content, etc.
Knowing that our Media Library was completely empty and none of our newly transferred posts had any images associated with them we started to freak out, but then we found this. Make sure to install the Attachment Importer plugin and navigate to Tools >> Import and click the Attachment Importer link.
Here, you’ll want to start feeding in either the original (large) eXtended RSS / WXR file or the (smaller) individual files that got created earlier in the import process, so the plugin can search and bring in the correct media files from your other WordPress installation.
This part of the process took a pretty long time for us, probably about 3-4 hours in total. We did purposefully lengthen this process by checking the box labeled “Delay file requests by at least five seconds.” as we didn’t want to deal with any HostGator server issues (too many requests, too quickly = server thinking its under attack), but we didn’t experience any server issues, so all-in-all it was worth the extra time, in our opinion.
After finishing the import process and verifying all of our content and media were present, we took a deep breath and moved on to installing our theme and a couple plugins. As this will be left up to you to customize for yourself, we’ll skip over those details today, but share with you the theme / framework used here for the AudioAcrobat Blog: Genesis framework w/Metro Pro theme.
Site Redirect
OK, now that we had installed our “new” blog, exported content from the “old” blog, imported this content into our “new” blog and customized the look and feel by adding a parent and child theme, as well as a couple plugins, we needed to start bringing in the traffic which was still going to our “old” blog.
Easier said than done? Not really… while all of our traffic was still going to the indexed and referenced location of our previous blog, WordPress.com has an upgrade which redirects ALL traffic hitting our “old” blog, and sends it to the correct page on our “new” blog — yay!
Note: This upgrade isn’t free. It costs about $1 and change per month. Check it out here.
While we weren’t immediately excited about paying WordPress to perform this task, it’s literally the only way you’ll be able to ensure that those posts / pages indexed in Google, which bring in traffic, are taking these visitors to your “new” blog, as opposed to the “old” one.
Move Stats + Subscribers
Supposedly, this is an extremely easy task for most WordPress users. It didn’t work for us, so we had to contact Jetpack support, who ended up completing this task on our behalf within 24 hours after submitting our request.
If you’d like to give it a shot yourself, start here. If it doesn’t work, there’s always Jetpack support.
Blog Visibility: Private
Last but not least, it is highly recommended that users moving away from WordPress.com should still keep their WordPress.com blog active, but change the visibility permission to private. More on that here.
Bonus: Google Change of Address
This nugget of info gets lumped into the “Bonus” category simply because we weren’t able to use it ourselves, as it only works for “top level” domains, but you may find it useful in certain migrations that actually do involve a top level domain.
Nestled within the Google Webmaster Tools, there is this handy little “Change of Address” tool, which lets Google know when you’ve moved your content / site / domain / etc., which Google describes as, “We’ll update our index to reflect your new URL. Changes will stay in effect for 180 days, by which time we’ll have crawled and indexed the pages at your new URL.” Pretty spiffy, eh?
Well, that’s it folks — the rest is history! Since you’ve been able to read this post on our “new” blog here at http://blog.audioacrobat.com, you can see for yourselves that we made it out on the other side of this exodus / migration / transfer, whatever you’d like to call it, with a great deal of positivity and guile.
Most importantly, we want to leave you with the fact that IT CAN BE DONE, without losing all of the fantastic things that make WordPress.com such a popular blogging platform and while gaining complete control over your content and hosting.
If you’ve used this guide for any part of the process for your business or personal site(s), go ahead and give yourself a pat on the back for a job well done!

![[eBook] FREE Audio Editing eBook by AudioAcrobat](https://i1.wp.com/blog.audioacrobat.com/wp-content/uploads/2012/12/2012-12-13_13-00-23.png?resize=350%2C200)

